WordPress SAML tutorial
This tutorial provides a comprehensive guide for configuring SAML v2 SSO authentication for WordPress as a Service Provider (SP) using the MiniOrange plugin.
I - Technical Prerequisites
- A functional WordPress server
- Basic knowledge of WordPress
- Plugin MiniOrange SAML Single Sign On - SSO Login
- Access to the following variable:
$AuthSezam Metadata= an URL or a XML file*
- Right access for administration in your Service Provider system
*Provided by OpenSezam team in a private communication
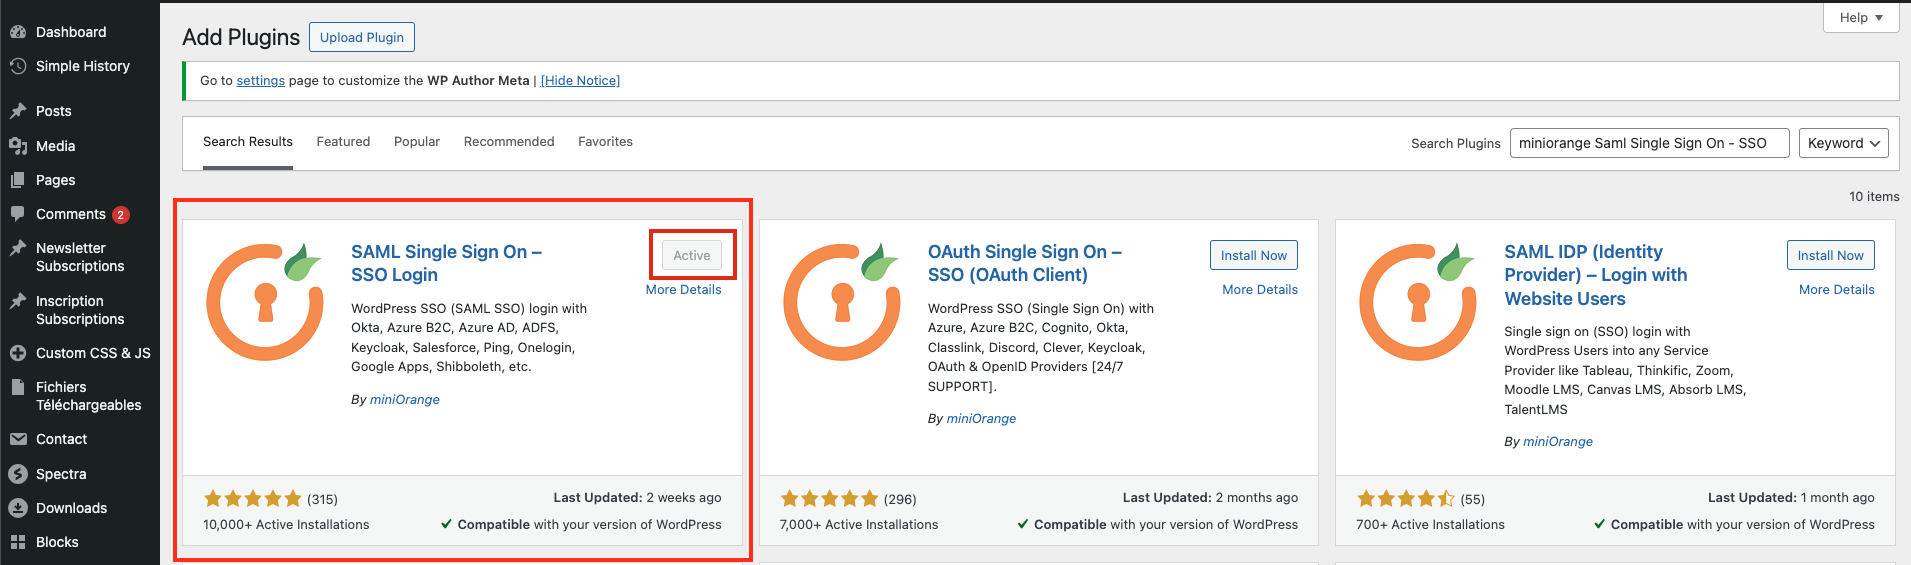
II - Installing
- Go to Plugins > Add Plugin in WordPress
- Search for "MiniOrange SAML Single Sign On"
- Click Install Now and then Activate
III - Configuring
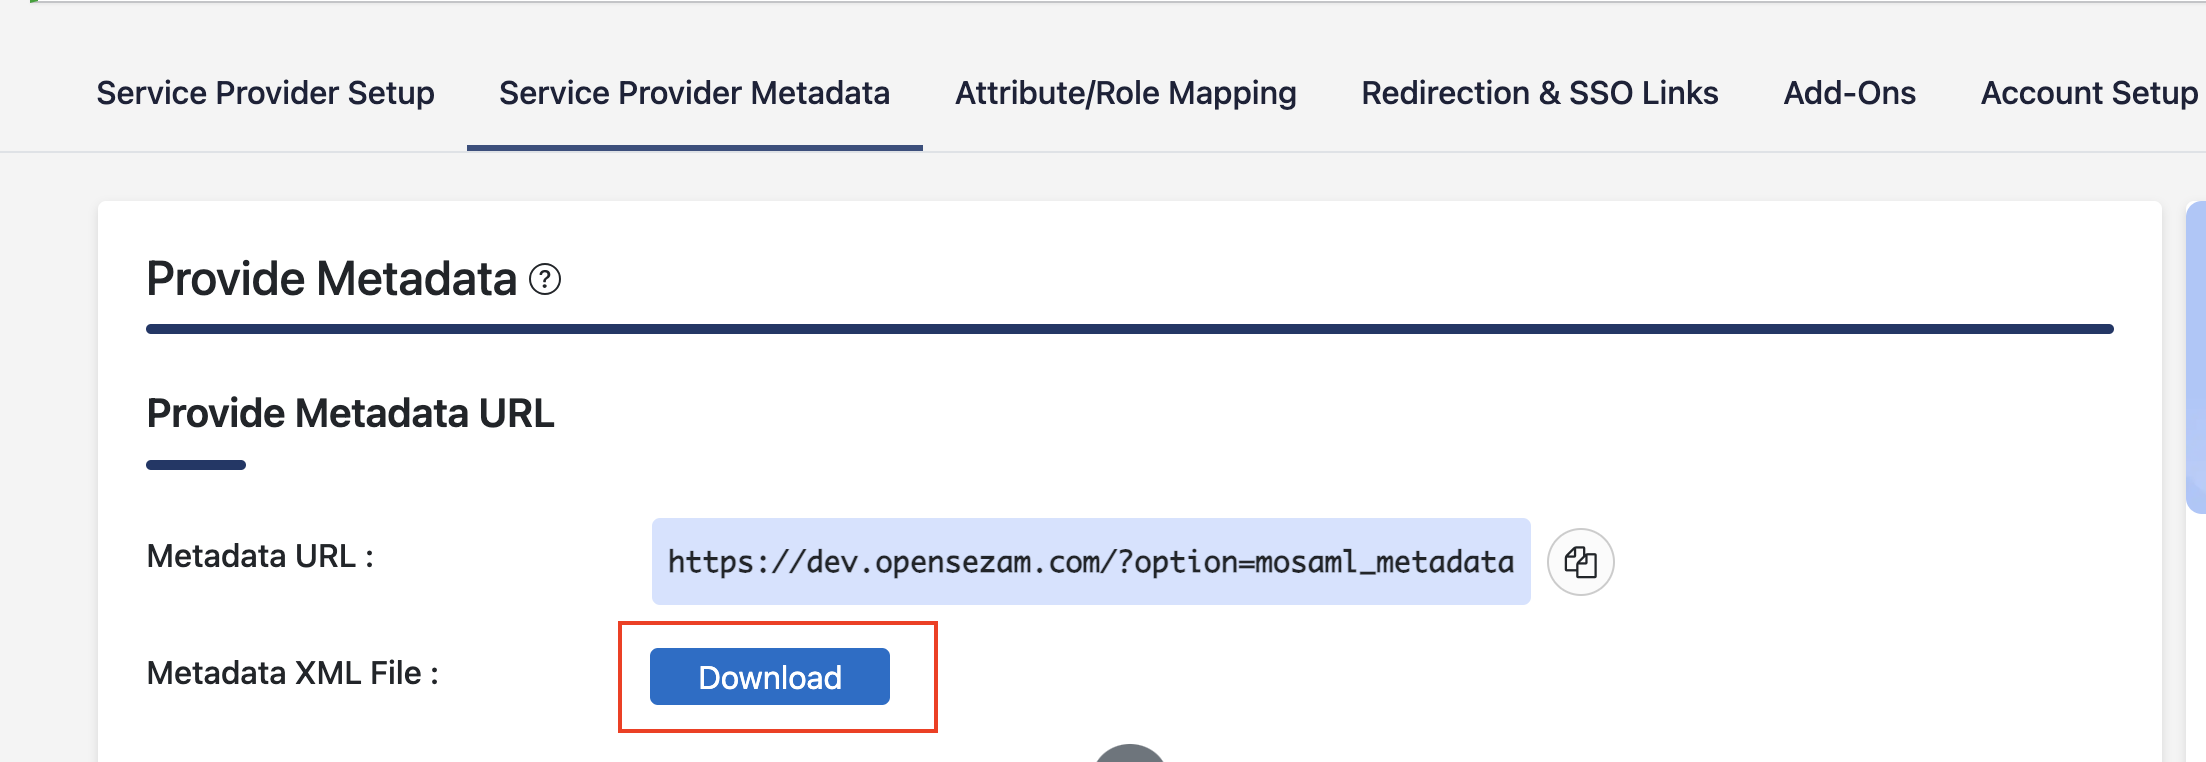
- Go to miniOrange SAML > Service Provider Metadata
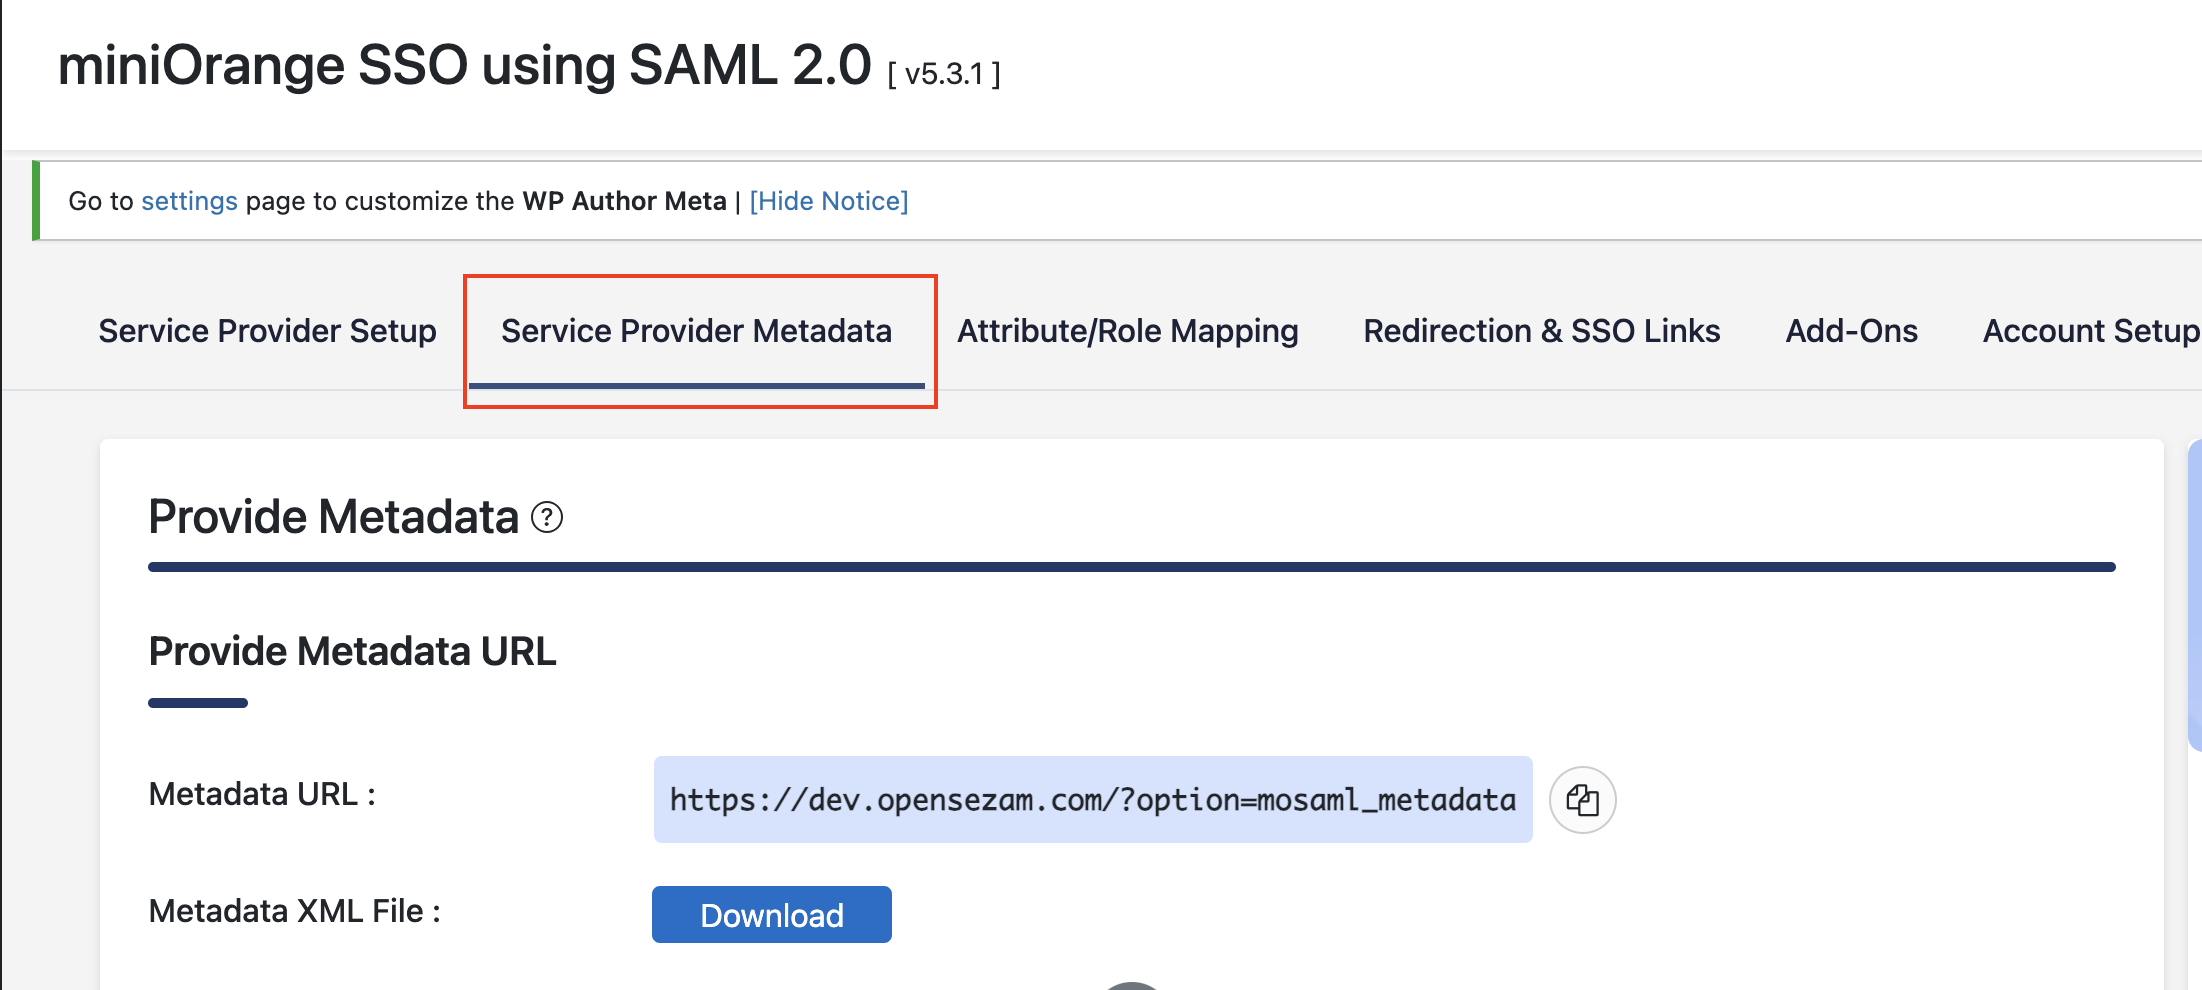
- Click Download Metadata, save the XML file and send it to OpenSezam
- Go to miniOrange SAML > Service Provider Setup > Configure Service Provider and click "Upload IDP metadata"
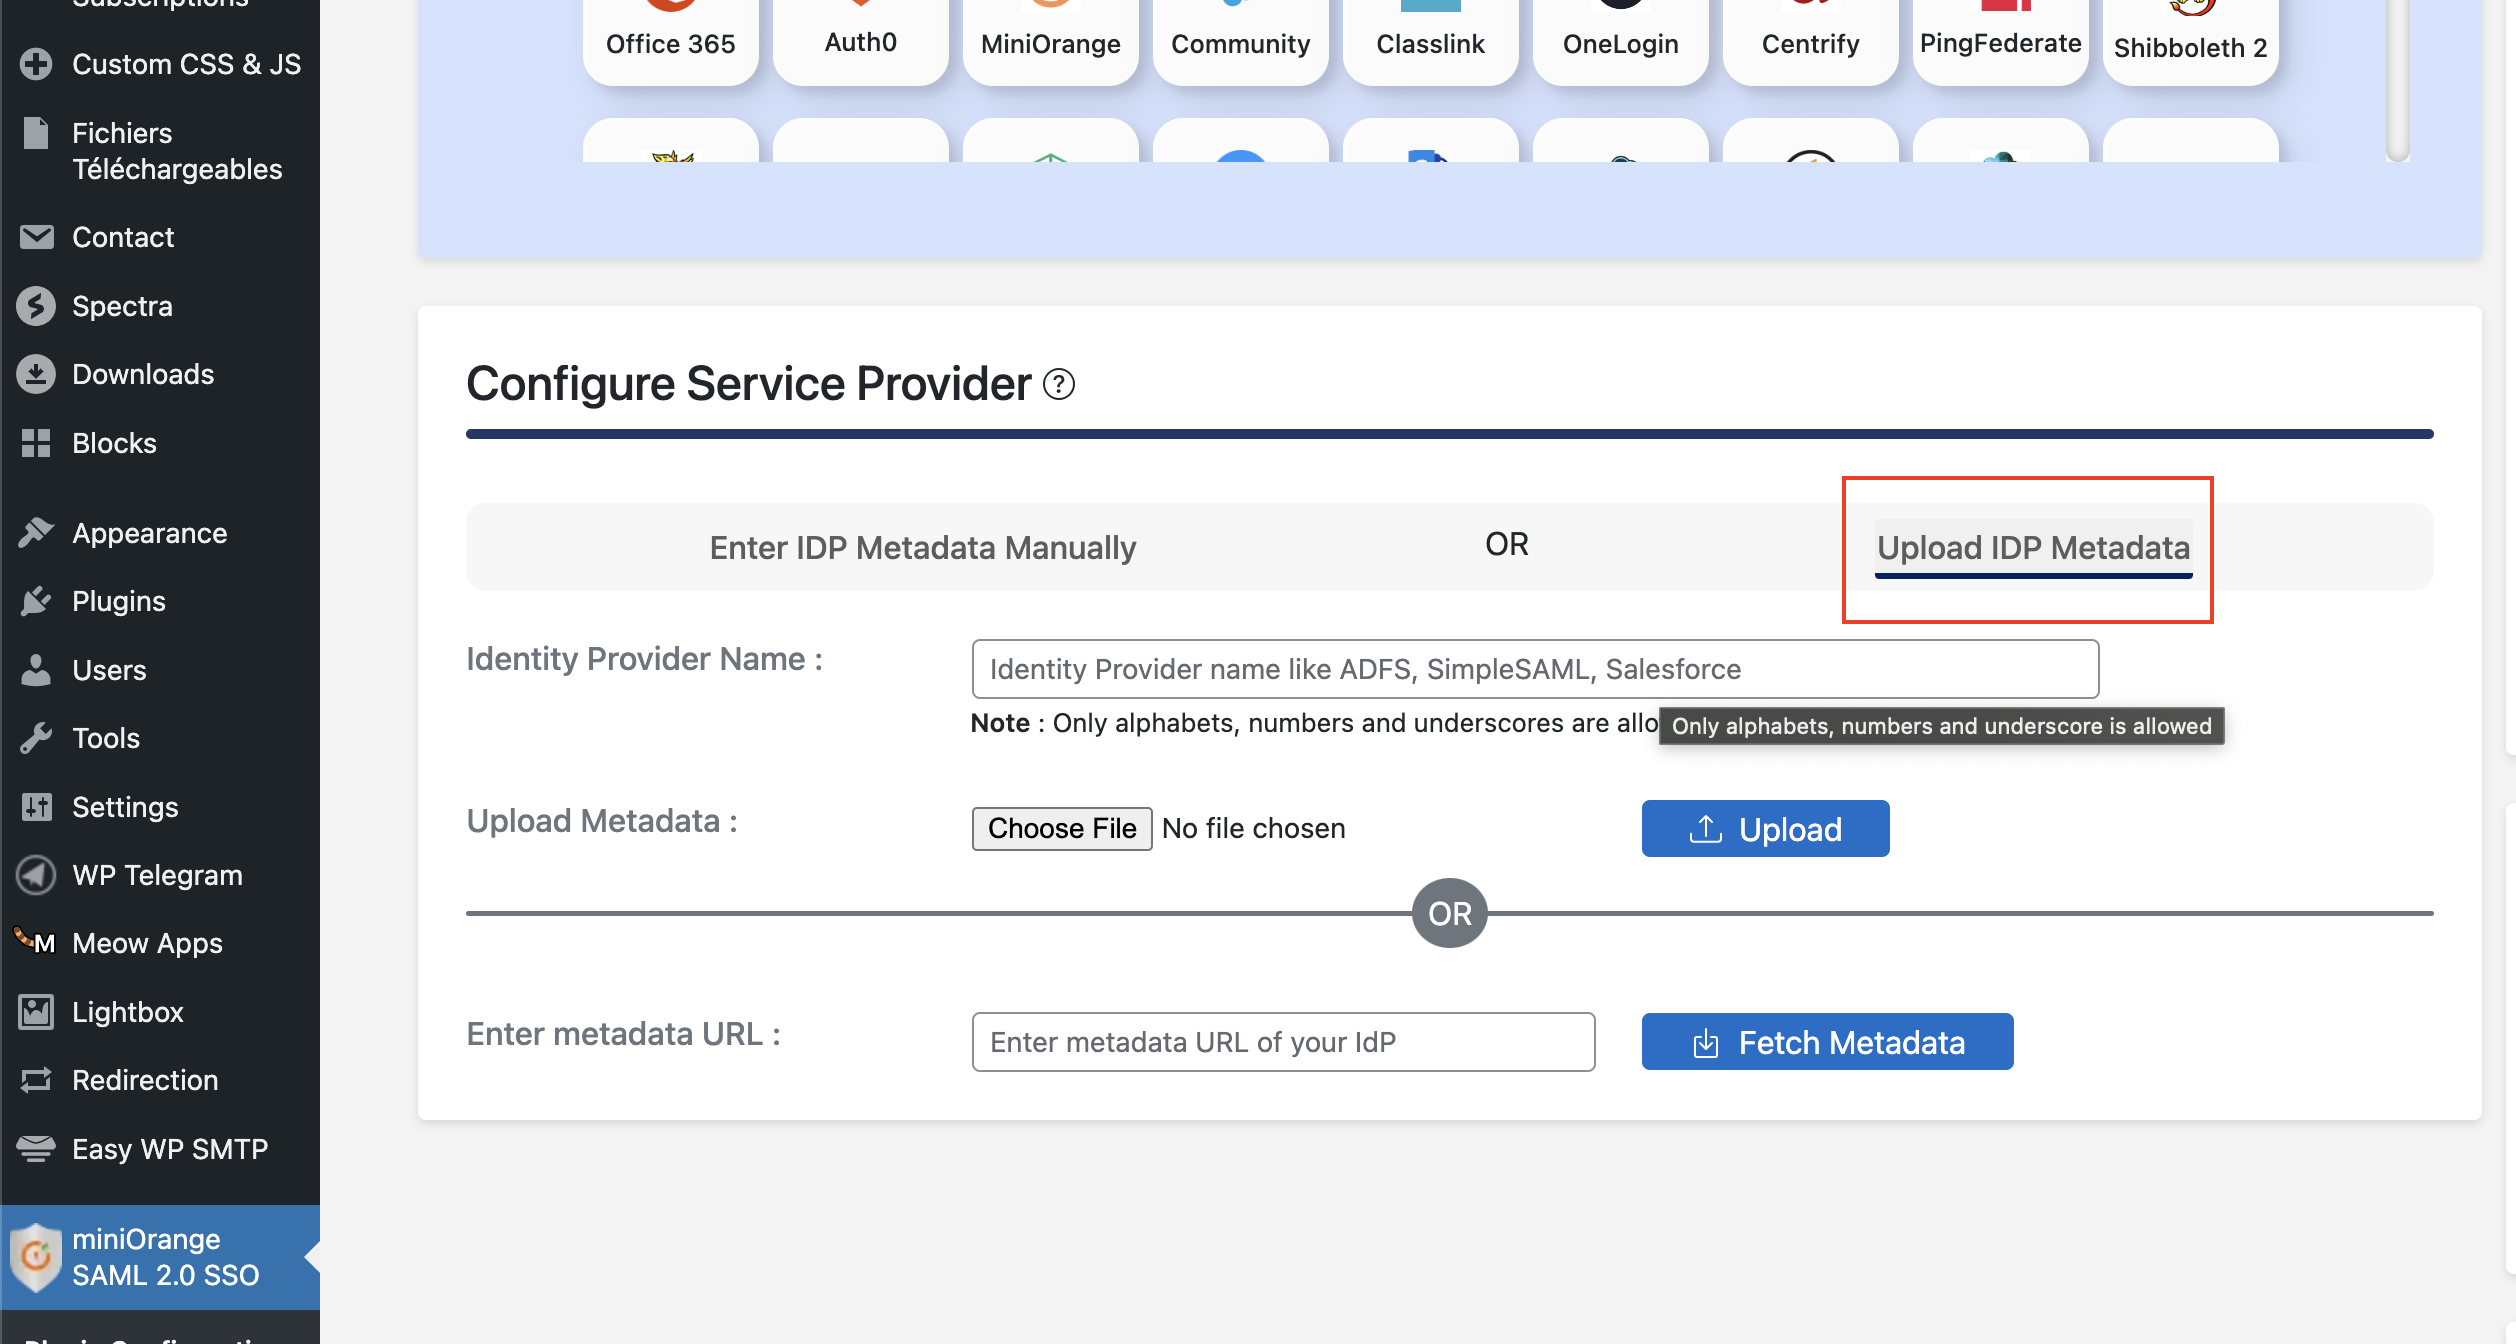
-
In "Identity Provider Name" field, enter AuthSezam
-
In "Enter metadata URL" field, paste your
$AuthSezam MetadataURL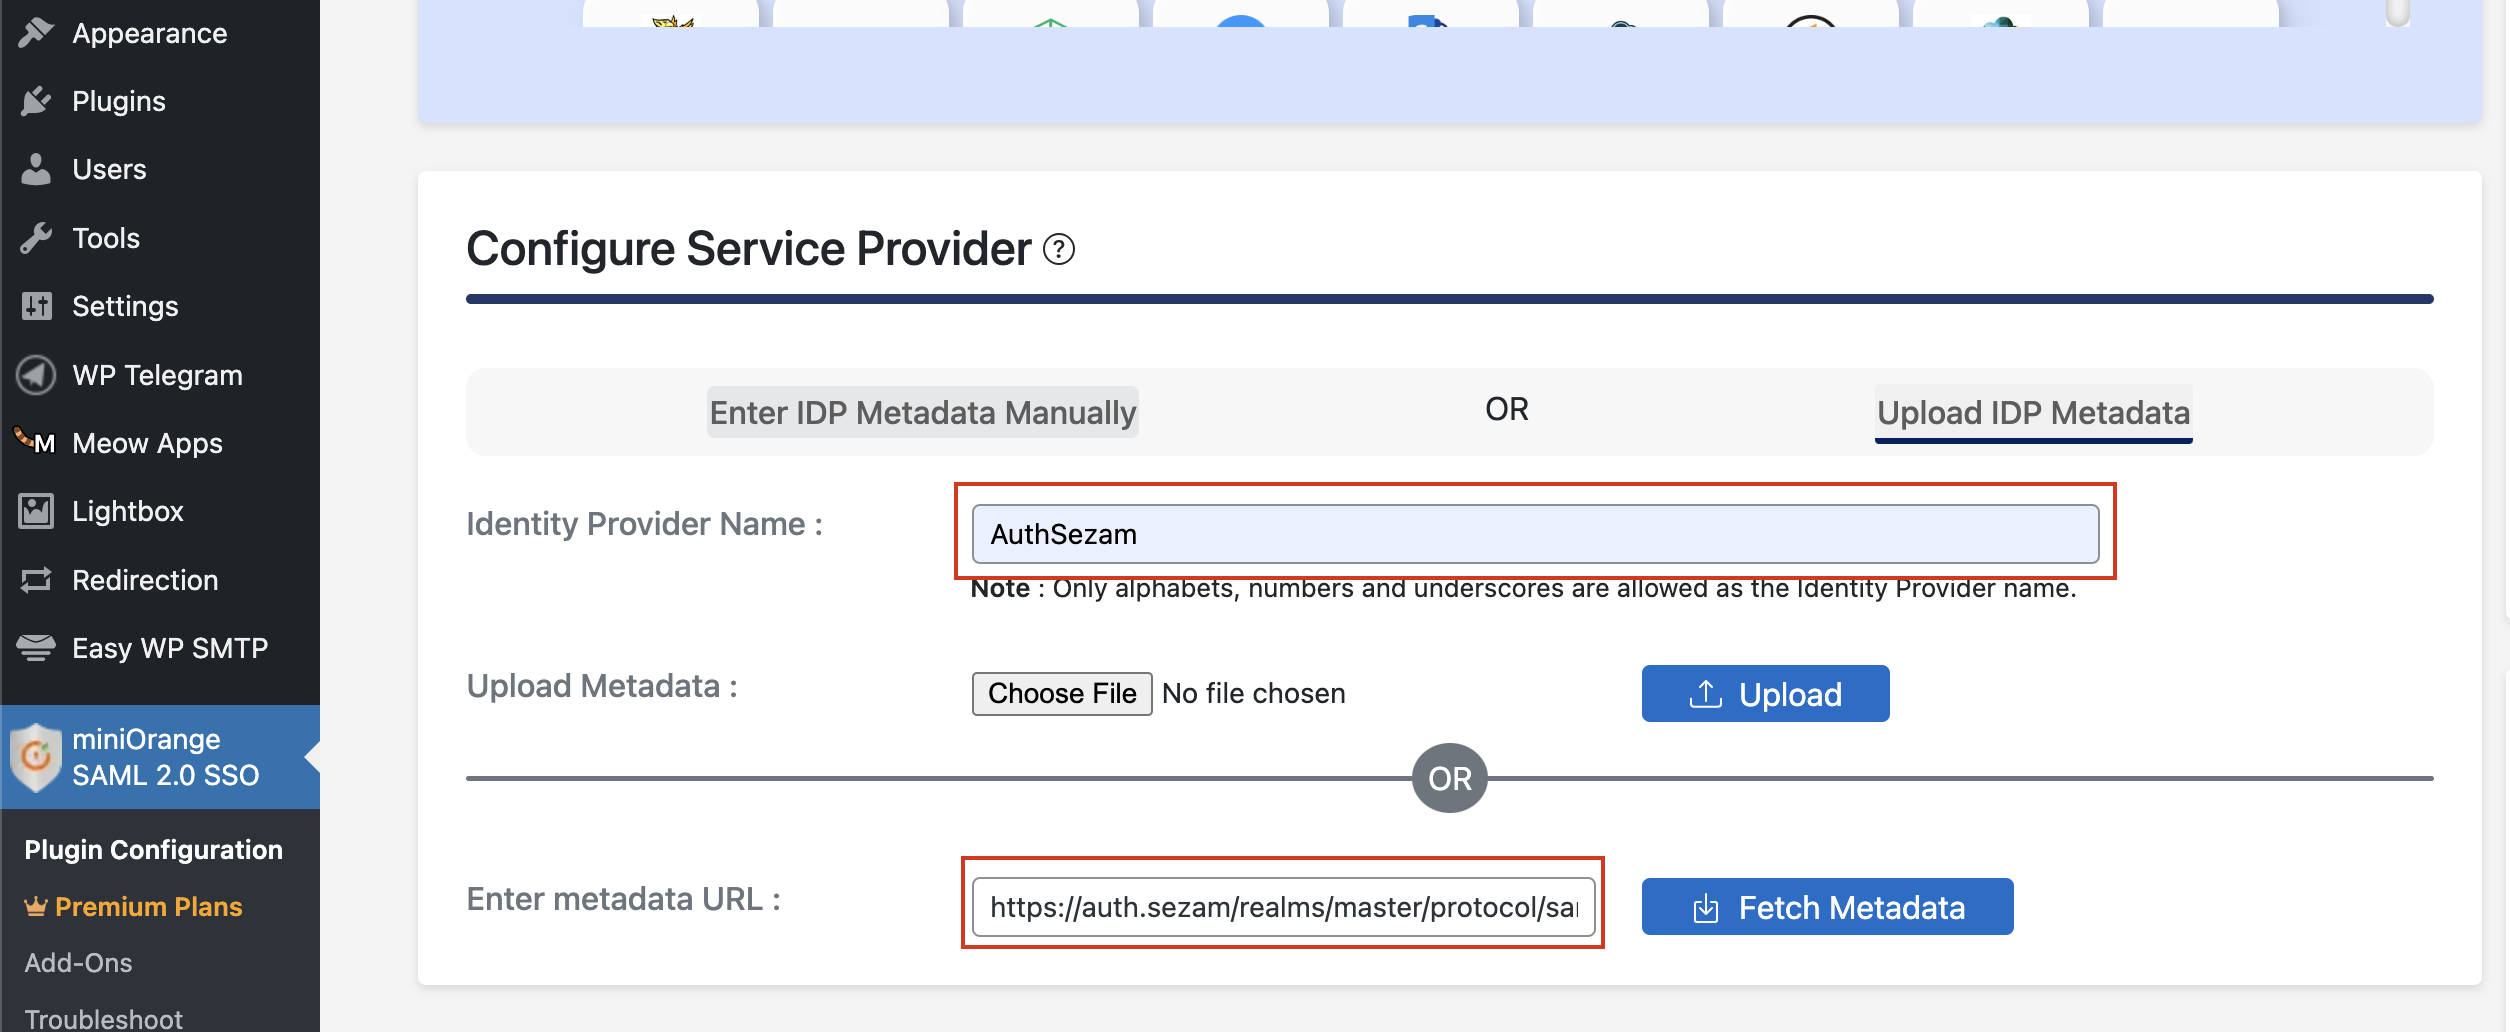
-
Click Fetch Metadata
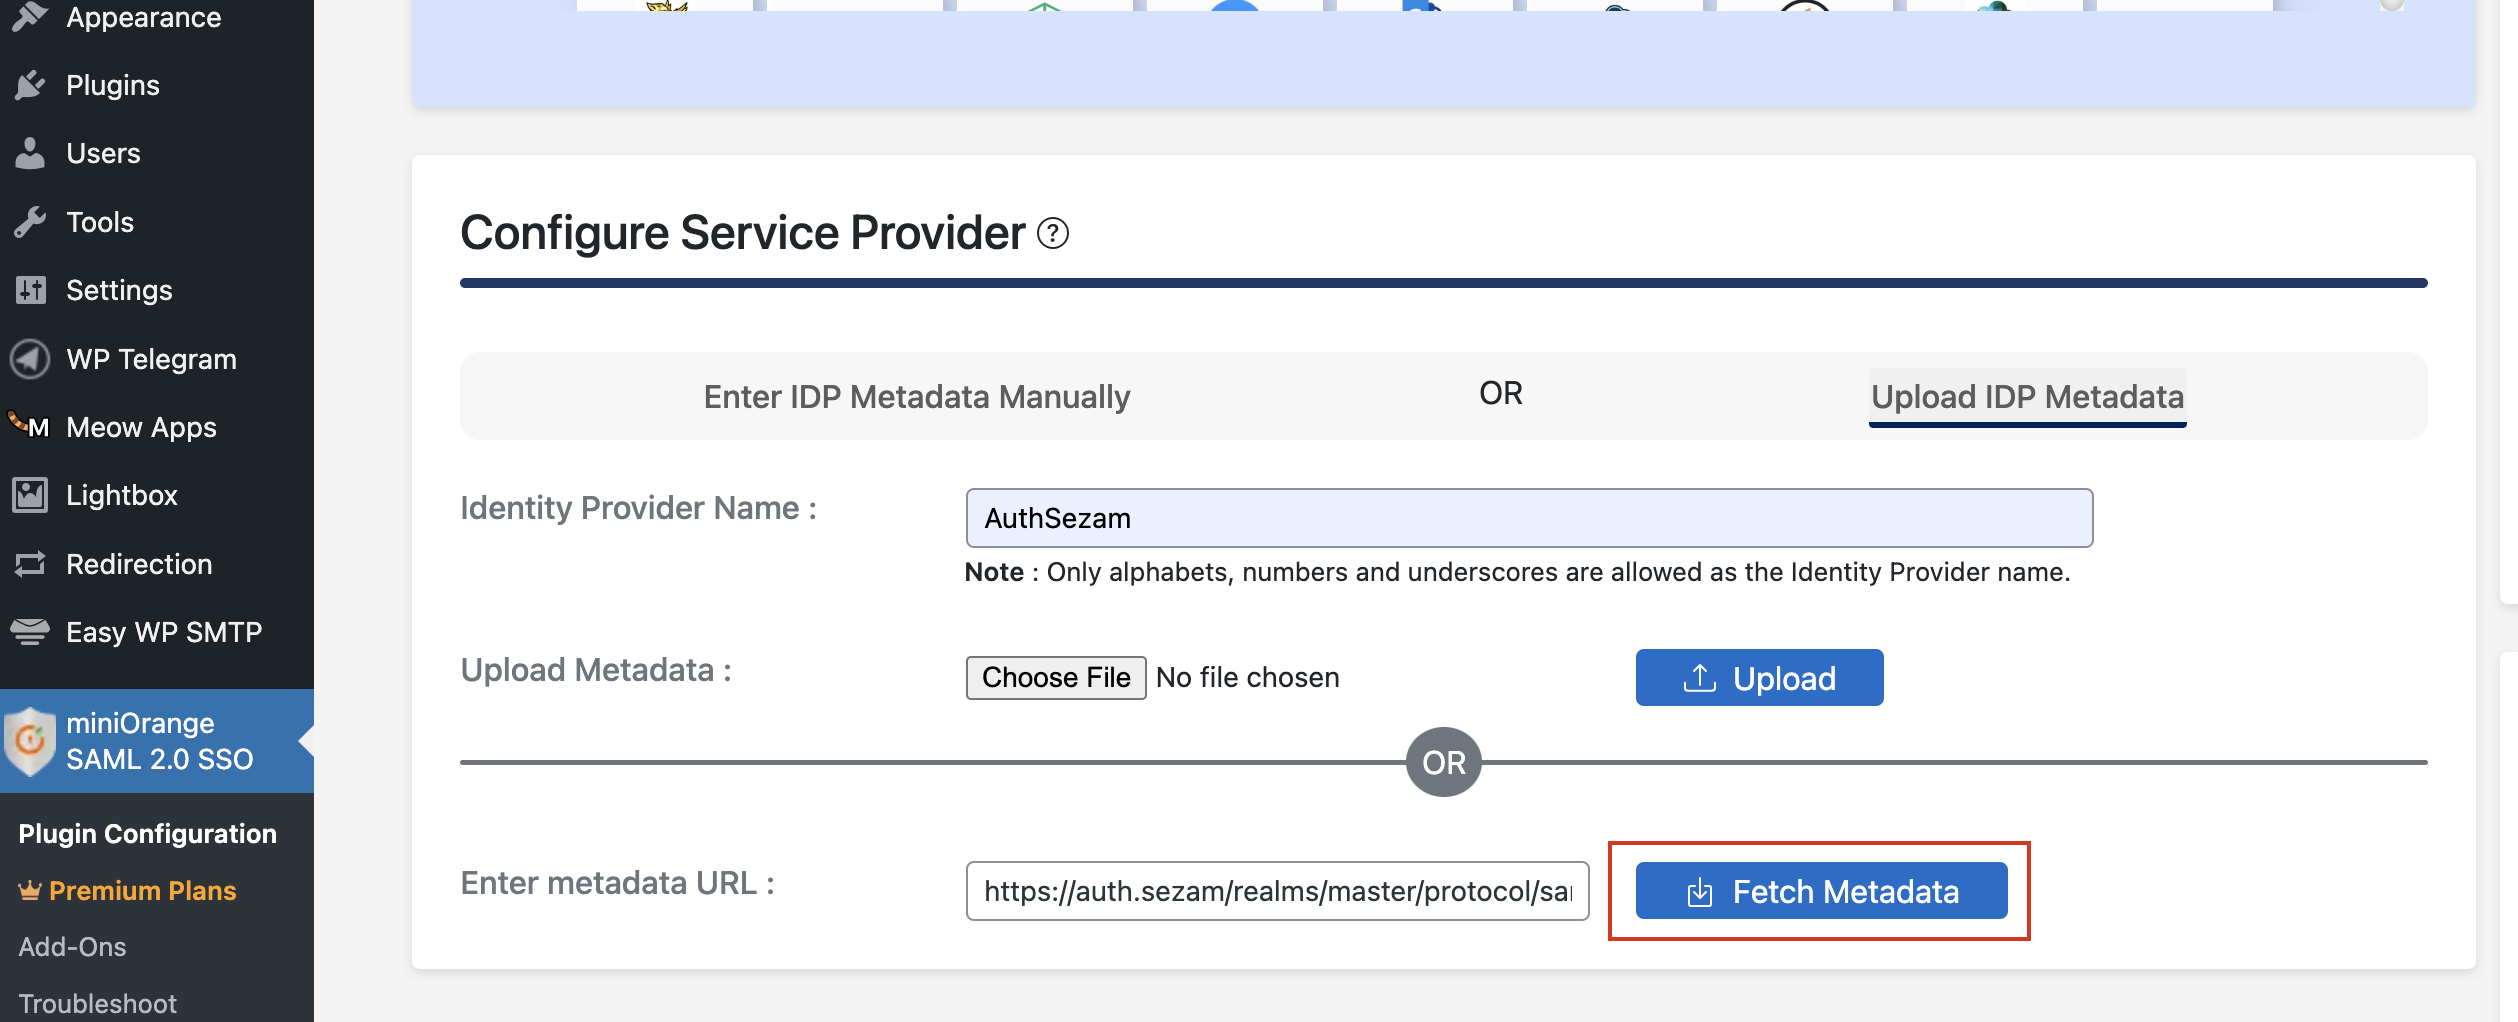
This diagram is a summary of the configuration above.
IV - Testing and Validation
-
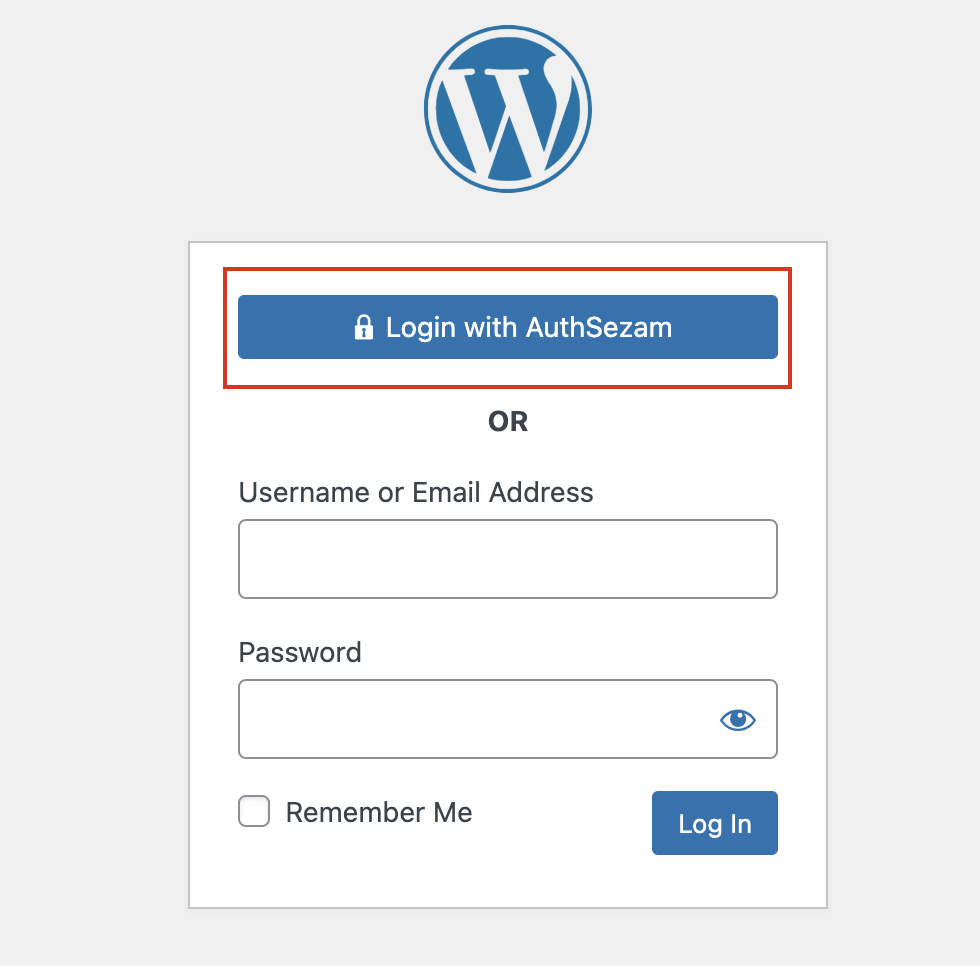
Open incognito browser window
-
Go to WordPress site and click "Login with AuthSezam"
-
Should redirect to AuthSezam login
-
Enter credentials and verify redirect back to WordPress
-
Check successful login