Entra ID EAM Tutorial
Welcome to the Entra ID EAM setup tutorial. This tutorial will guide you through the steps to integrate AuthSezam with Entra ID, specifically by adding AuthSezam as a multi-factor authentication (MFA) method using a magic link.
Watch the following video for a quick overview of the integration process and its benefits.
I - Technical Prerequisites
To set up OIDC implicit on a Entra ID, you need :
- Knowledge of Entra ID
- Activate MFA on Entra ID
- Access to the following variables:
$authorizationEndpoint: OIDC authorization endpoint*$clientId: OIDC client ID*$discoveryEndPoint: OIDC endpoint*
*Provided by us in a separate document
II - Installing the Components
- No components to install
III - Configuration
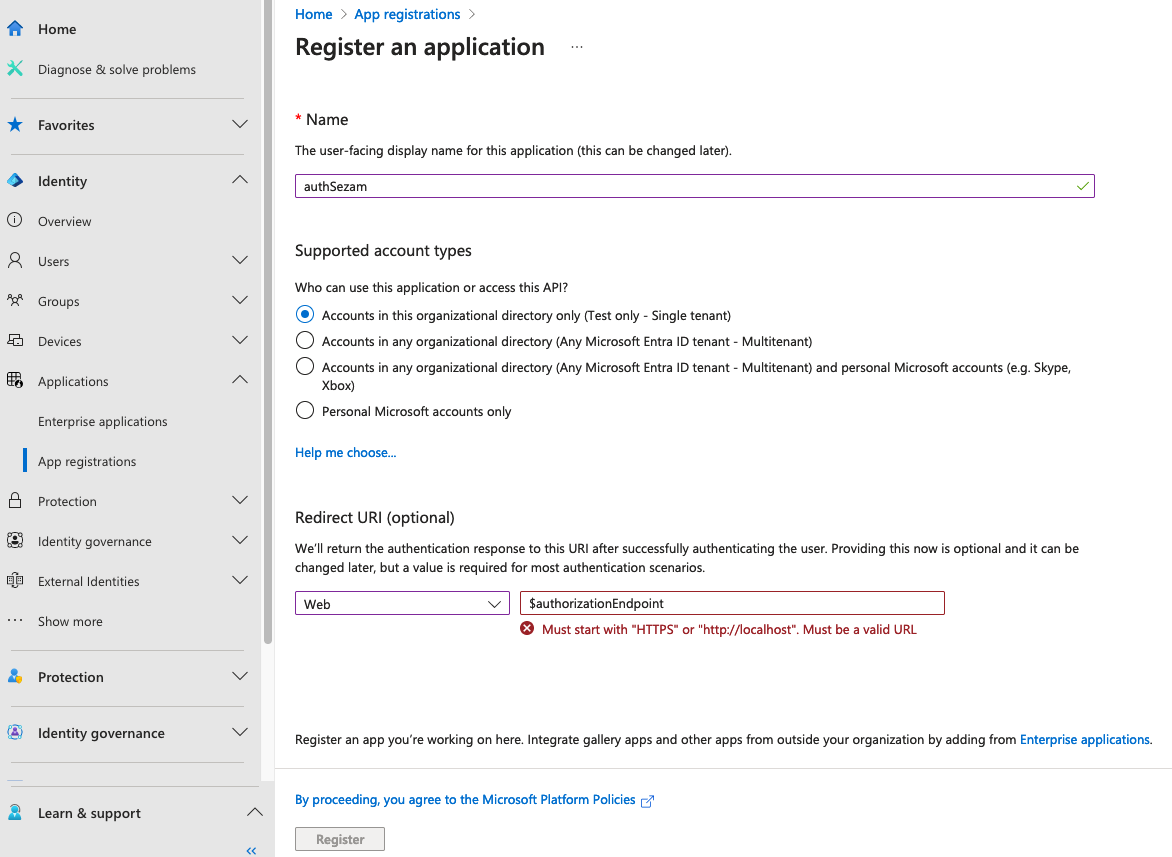
- Go to the "Identity" section
- Click on the "Application" tab and "App Registrations"
- Added a "New registration"
- Fill in the various fields:
- Name : the name of your choice
- Fill in the various fields with the provided prerequisites
- Click on "Register"

- Go to the application you've just created
- Recover application id
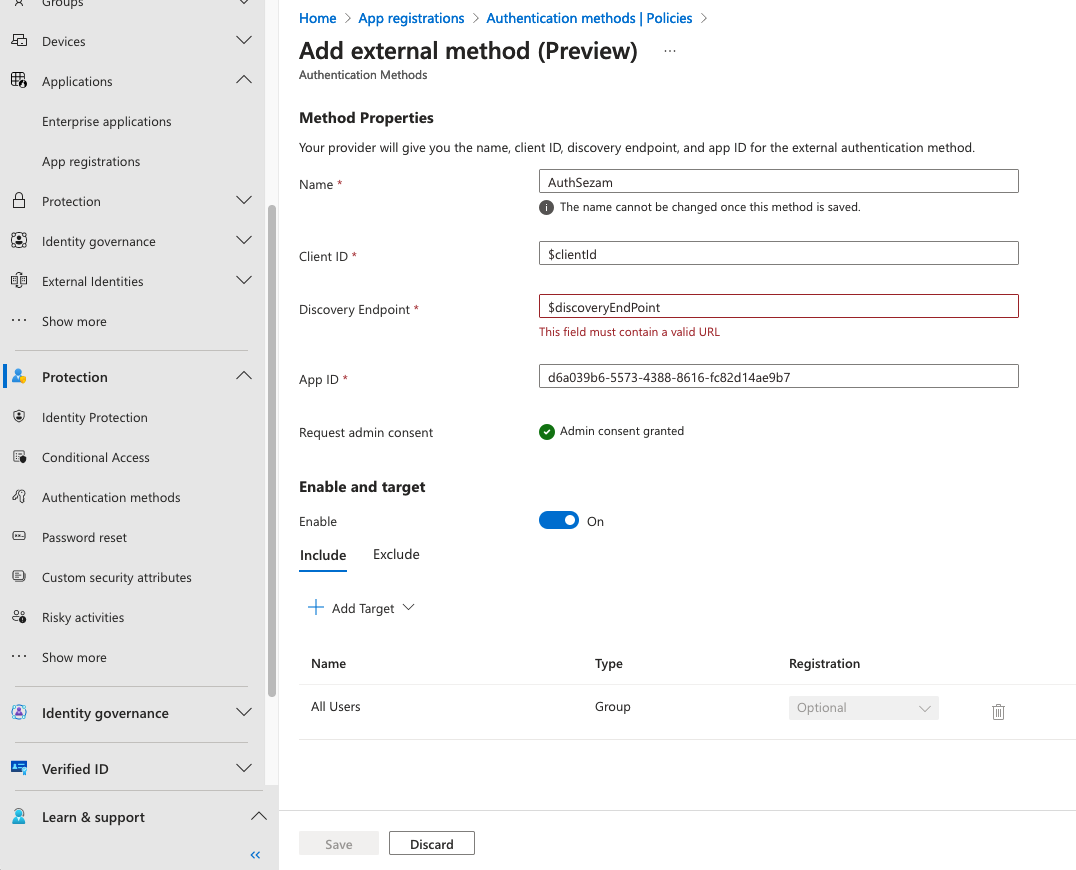
- Go to the "Protection" section
- Click on the "Authentication methods" tab
- Click on "add external method"
- Fill in the various fields:
- Name : the name of your choice
- Fill in the various fields with the provided prerequisites
- App ID : the retrieve id of the application you've just created
- Enable the application
- Apply to the group you want

IV - Testing and Validation
- You can log out and test with the new AuthSezam authentication method